|
Procedure 1 – Print out the 1st File
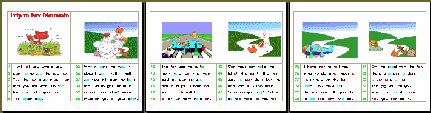
Click the blue Word Icon labeled "Front" to open download and open
the first section.
It should look like the above at 22% reduction.
If you are using a MAC or would like to use PDF format, click the red icon
labeled front.
Go to – File – Print – Properties – Device Option
and set the printing quality to "fast" for your first test copy to
save time.
Once you know it’s working properly you can change it to "normal"
for higher quality.
Print the 3 pages as seen above.
Take the papers out of the paper tray keeping in the same order as they were
and place them back on top of the paper feeder tray. For Hewlett Packer
Deskjet (and most other) printers you’ll want to put them back in the
printer paper feeder tray with the pictures facing out.
Procedure 2 – Print out
the 2nd File
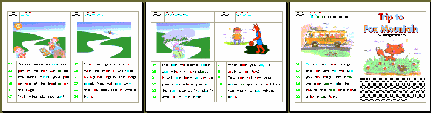
Click the link above "Back" for the back pages of Trip to Fox Mountain
They should look just
like the file above.
Print the pages – making sure the pages from the previous 3 pages are in
place.
Take all pages out of the printer and fold perfectly down the center.
Use a large stapler to staple the center of the pages together.
There you go – your very own Internet book.
Keep an eye out – book two will be coming soon.
|